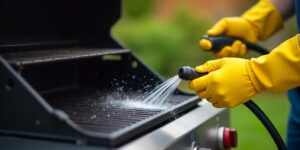
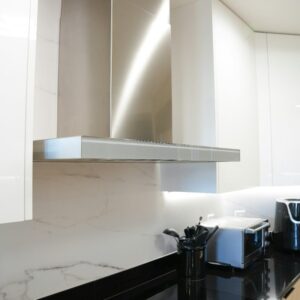
Your rangehood works tirelessly to remove smoke, grease, and cooking odours from your kitchen. But when was the last time you cleaned its filter? A dirty rangehood filter not only reduces your appliance’s efficiency but can also pose fire hazards and leave your kitchen smelling less than fresh.
Cleaning your rangehood filter regularly is one of the most important maintenance tasks for your kitchen. The good news? It’s easier than you might think. This guide will walk you through everything you need to know about cleaning rangehood filters, from identifying when they need attention to getting them sparkling clean.
Signs Your Rangehood Filter Needs Cleaning
Most rangehood filters should be cleaned monthly with regular cooking, but heavy use may require more frequent attention. Watch for these telltale signs:
- Visible grease buildup or discolouration
- Reduced suction power when cooking
- Lingering cooking smells after use
- Grease dripping from the filter
- Increased noise from the rangehood motor
What You’ll Need
Before starting, gather these common household items:
- Warm water
- Dish soap or degreasing detergent
- Baking soda (for stubborn grease)
- Soft-bristled brush or old toothbrush
- Clean tea towels
- Rubber gloves (optional)
Step-by-Step Cleaning Process
Step 1: Safety First
Turn off your rangehood and allow it to cool completely if you’ve been cooking recently. Ensure the power is disconnected at the wall switch to prevent accidental activation during cleaning.
Step 2: Remove the Filter
Most rangehood filters slide or clip out easily. Consult your rangehood manual if you’re unsure, but generally, you’ll need to:
- Push the filter towards the back of the rangehood
- Lower the front edge and pull it out
- For some models, you may need to remove clips or screws
Step 3: Assess the Filter Type
Metal filters (aluminium or stainless steel) can be cleaned and reused. Charcoal filters need replacement and cannot be washed. Paper filters should also be replaced rather than cleaned.
Step 4: Clean Metal Filters
Fill your sink with hot water and add a generous amount of dish soap or degreasing detergent. For heavily soiled filters, create a paste with baking soda and water.
Soak the filter for 15-20 minutes to loosen grease buildup. Use a soft brush to gently scrub away stubborn spots, working along the grain of the metal mesh. Rinse thoroughly with hot water until all soap residue is gone.
Step 5: Dry and Reinstall
Pat the filter dry with clean tea towels, then allow it to air dry completely before reinstalling. Any remaining moisture could cause damage to your rangehood’s motor.
Once dry, carefully slide the filter back into position, ensuring it’s securely locked in place.
Alternative Cleaning Method: Dishwasher
Many metal rangehood filters are dishwasher-safe. Place the filter on the bottom rack, use a normal wash cycle with regular dishwasher detergent, and avoid heated dry settings which can warp the filter.
When DIY Isn’t Enough
Sometimes, despite your best efforts, rangehood filters remain stubbornly greasy or damaged. Professional cleaning services have specialised equipment and industrial-strength, safe cleaning products that can restore even the most neglected filters.
Professional cleaners can also inspect your entire rangehood system, clean internal components that aren’t accessible during regular maintenance, and identify potential issues before they become costly problems.
Keep Your Kitchen Running Smoothly
Regular rangehood filter cleaning improves air quality, reduces fire risks, and extends your appliance’s lifespan. While monthly DIY cleaning works for most situations, don’t hesitate to call professionals when you need a deeper clean or encounter persistent problems.
Ready to give your rangehood the professional treatment it deserves? Contact Rapid Oven Cleaning to schedule expert rangehood cleaning that will have your kitchen ventilation working like new again.